

Perspex Sheet Care: How to Clean, Handle and Store It
Looking after a Perspex sheet? Learn how to clean, handle, store and polish acrylic without scratching, crazing or fogging it. Practical tips from Australian suppliers.
A Perspex sheet is clear, light and tough, but it is not indestructible. Most of the complaints we hear about acrylic, such as hazy surfaces, fine scratches, cloudy edges and fine cracks, come down to how the sheet was handled, cleaned or stored rather than the material itself. This guide covers the practical care side of acrylic: what to do before, during and after installation so your sheet looks good for years.
If you are still deciding which type of sheet to buy, start with our range of Perspex acrylic products . If you already have sheet on hand, read on.
Why Perspex needs different care to glass
Acrylic is a thermoplastic. It is far lighter than glass and much more impact resistant, but its surface is softer, so it can scratch if wiped with the wrong cloth. It is also sensitive to certain chemicals. Solvents, ammonia-based cleaners and some aggressive degreasers can attack the surface and cause clouding or fine stress cracks, particularly in areas under stress such as around drilled holes and bent edges.
Acrylic also builds up static, which attracts dust. That is why a dry wipe so often leaves scratches: you are dragging fine grit across the surface. The fix is simple: always rinse or wet the surface before you wipe.
Handling and storage before the job starts
Most scratches happen before the sheet is installed. A few habits make a big difference:
Leave the film on. The masking film is there to protect the surface during transport, cutting, drilling and fitting. Remove it only when the work is complete.
Store flat and supported. Sheets leaned at an angle for long periods can bow. Lay them flat on a clean, even surface, or store them upright in a proper rack with full support.
Keep it away from heat, sun and solvents. Heat can warp acrylic, and solvent vapours or spilled chemicals can mark the surface. Keep sheets away from paint thinners, adhesives and cleaning chemicals in the workshop.
Lift, do not drag. Sliding one sheet over another, or across a bench with swarf on it, is a quick way to scratch both faces. Carry sheets on edge with clean gloves where possible.
Cutting and fabrication: protect the edges
Cloudy or chipped edges usually come from the cut, not the sheet. Using the right blade or cutter, supporting the sheet properly and avoiding overheating all help, and a flame or diamond polished edge gives a clear, finished look. If you would rather skip the guesswork, you can order sheet cut to your exact dimensions using our cut-to-size pricing calculator , or talk to us about our plastic fabrication services for more complex shapes, drilled holes and finished edges.
How to clean a Perspex sheet properly
Once the sheet is installed and the film is off, routine cleaning is simple. Rinse away loose dust with clean water, then wash gently with lukewarm water and a drop of mild dishwashing liquid using a soft sponge or microfibre cloth. Rinse again and dry with a clean, soft cloth. Avoid paper towel, which can be abrasive, and avoid household glass cleaners, methylated spirits, acetone, thinners and abrasive cream cleaners.
For anti-static benefits and a clean finish, many people use a purpose-made acrylic cleaner or anti-static polish. Follow the product directions and test on an offcut first. High-touch applications such as acrylic display cabinets benefit from a regular gentle clean so fingerprints and dust do not build up and tempt someone to wipe them off dry.
Dealing with scratches and haze
Light surface scratches can often be reduced with a plastic polish applied by hand with a soft cloth. Work gently, in small areas, and always test on an offcut or hidden corner first. Deep scratches, gouges and cracks are harder to fix and may need professional polishing or replacement.
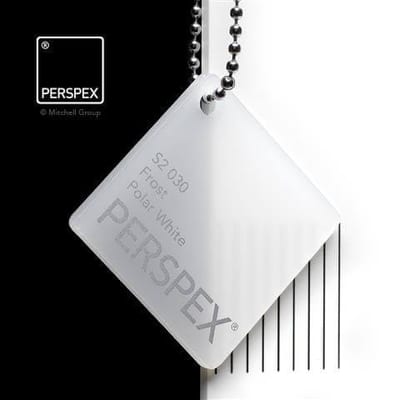
If haze appears after cleaning, the likely culprits are an unsuitable cleaner, residue left behind, or a surface that was wiped dry. Rinse thoroughly with clean water and try again with mild soapy water. For frosted or textured finishes, such as Perspex Frost , use only gentle washing, as polishing will change the intended finish.
Choosing the right sheet to reduce maintenance
Care starts with choosing the right material for the job. A sheet used for a high-traffic shelf, counter or protective screen will see more wear than one in a framed picture. Consider the finish, the environment and how often the surface will be touched. Our standard Perspex acrylic sheet is available cut to size, and our team can help you choose between clear, tinted, frosted and other finishes for your application.
Keep your Perspex looking new
Good care comes down to a few repeatable habits: keep the film on until the end, store sheet flat, rinse before you wipe, use mild soapy water, and avoid solvents and ammonia-based cleaners. Follow those rules and a Perspex sheet will stay clear and attractive for a long time.
Ready to order? Get an instant cut-to-size price with our pricing calculator , or contact us for a quote and advice on the right Perspex sheet for your project.